I am writing this blog to explain the automotive connector crimping process. I work in automotive manufacturing. I see crimping every day. I know how important it is. A bad crimp can cause big problems. It can lead to power loss. It can cause a car to fail. I want to help you understand how to get it right.
First, I will tell you what crimping is. Crimping joins a wire and a terminal. We use a tool to squeeze the terminal onto the wire. This makes a strong mechanical and electrical connection. It is not soldering. No heat is used. The metal deforms. It grips the wire tightly. This is the core of the process.
Why do we use crimping? I will give you three reasons. One, it is fast. We can do many crimps per minute. Two, it is reliable. A good crimp lasts the life of the car. Three, it works in tight spaces. Soldering needs room for heat. Crimping does not.
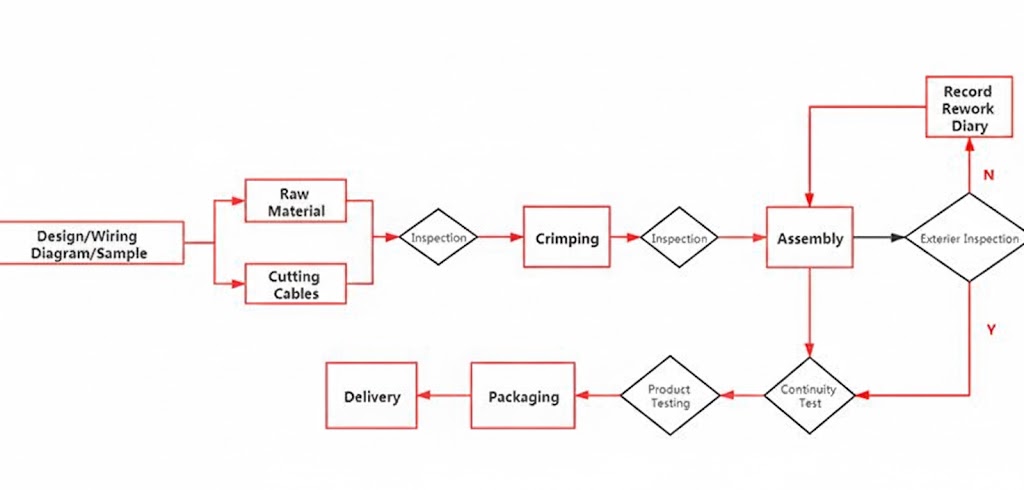
Now, I will show you the main parts of a crimp.
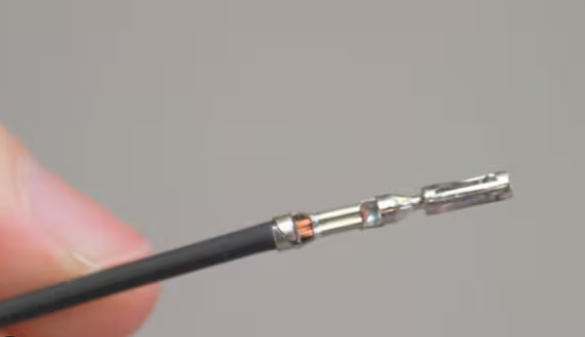
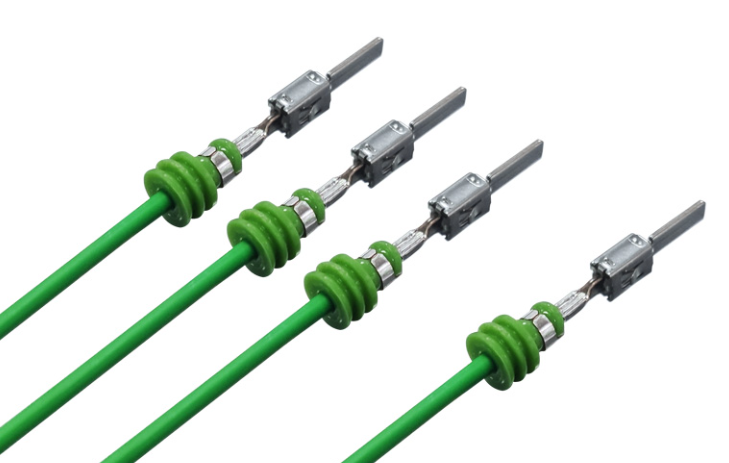
The first part is the insulation crimp. This part grabs the plastic coating of the wire. It holds the wire in place. It stops the wire from pulling out. It also stops bending stress at the conductor crimp.
The second part is the conductor crimp. This part squeezes the bare metal strands. It makes the electrical connection. It must be tight. But it must not cut the strands. We need all the strands to carry current.
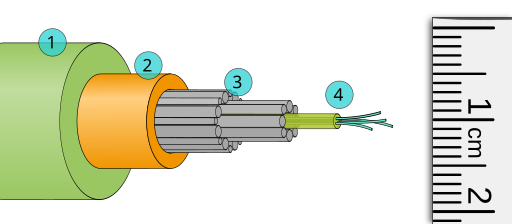
The third part is the wire itself. The wire has two zones. The stripped zone goes into the conductor crimp. The insulation zone goes into the insulation crimp. The strip length must be correct. Too long and the wire sticks out. Too short and the crimp is weak.
I use a crimping tool to make the connection. The tool has dies. The dies shape the terminal. I put the terminal in the tool. I insert the wire. I close the tool. The dies close. They form the crimp.
There are different types of tools. I use hand tools for small jobs. I use bench presses for medium volume. I use automated machines for high volume. The tool must match the terminal. A wrong tool will make a bad crimp.
The terminal material matters. Most terminals are copper alloy. They are strong. They conduct well. They resist corrosion. The plating is also important. Tin plating is common. It protects the copper. It helps with solderability.
Wire gauge is critical. I check the wire size. I match it to the terminal. A 22 AWG wire needs a 22 AWG terminal. A mismatch causes poor contact. It can lead to overheating.
I prepare the wire before crimping. I strip the insulation. I use a wire stripper. The strip length must be exact. I do not damage the strands. I do not nick the copper. Damaged strands break easily.
I inspect the stripped wire. I look for frayed strands. I look for broken strands. I twist the strands if needed. They must fit into the terminal barrel. Loose strands cause problems.
I insert the wire into the terminal. I push it all the way in. I check the back of the terminal. I should see the wire through the inspection hole. This hole shows me the wire is deep enough.
Now I crimp. I use the correct tool setting. I close the tool fully. I do not stop halfway. The crimp must be complete. I feel the tool lock. That tells me the cycle is done.
After crimping, I inspect the result. I look at the shape. It should match the tool die. It should not be too wide. It should not be too narrow. I check the insulation crimp. It should hold the wire jacket.
I perform a pull test. I attach a gauge to the wire and terminal. I pull with force. The wire should not come out. If it does, the crimp is bad. I record the force. I compare it to the standard.
I also check the crimp height. I use a micrometer. I measure the height of the conductor crimp. It must be within a tight range. Too high means loose. Too low means crushed.
I look for cracks in the terminal. I look for cut strands. I look for misalignment. Any defect means I reject the part.
I work in a clean area. Dust and oil can get into the crimp. They block metal-to-metal contact. They cause high resistance. I keep my tools clean. I store terminals in sealed bags.
I train new workers. I show them the right way. I let them practice. I watch their first crimps. I give feedback. Skill matters. Even with good tools, a bad operator can fail.
I use process control. I check crimps every hour. I log the data. I track trends. If the pull force drops, I stop. I check the tool. I check the wire. I fixed the problem.
I know that crimping is not magic. It is science. It is repeatable. It needs care. It needs attention to detail.
In conclusion, a stable electrical connection starts with good crimping. I have shown you the steps. I have explained the key points. I hope this helps you make better crimps.