Hello everyone! Do you want to know how we turn your first idea into a reliable, mass-produced wiring harness? This blog post will walk you through our whole work flow, step by step.
Step 1: Understanding Requirements and Defining Goals
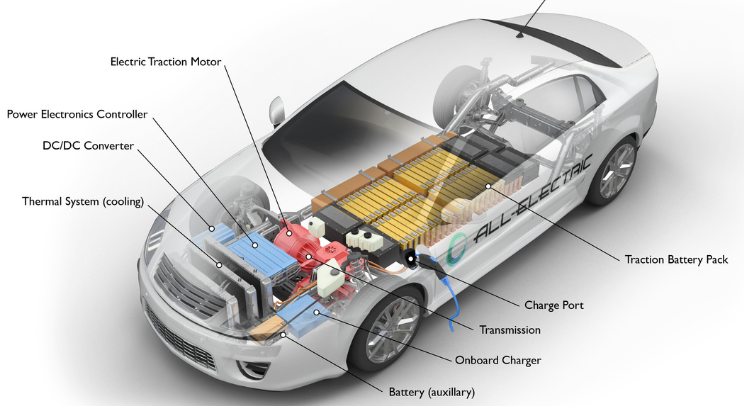
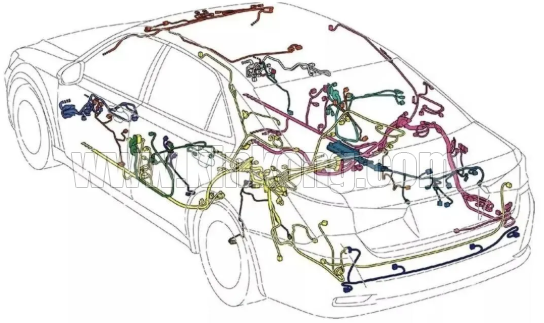
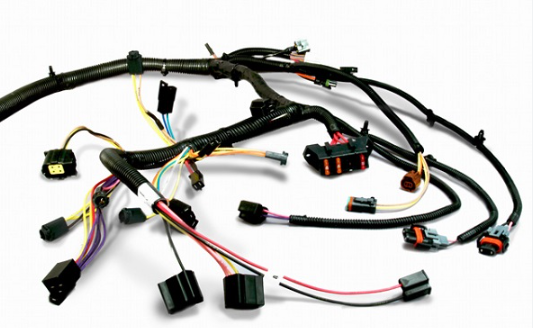
Every project starts with a clear need. My client is an emerging new energy vehicle company. They needed to develop a full set of low-voltage wiring harnesses for a new model. This wiring harness is like the car’s neural network, responsible for connecting and transmitting signals and power for all electronic devices.
The client provided a detailed requirements document. My team and I held multiple meetings with the client. We discussed every detail. These details included which electronic control units the wiring harness needed to connect. Details also included the specific locations of sensors and actuators. Details also involved the layout of the vehicle’s entire electrical architecture.
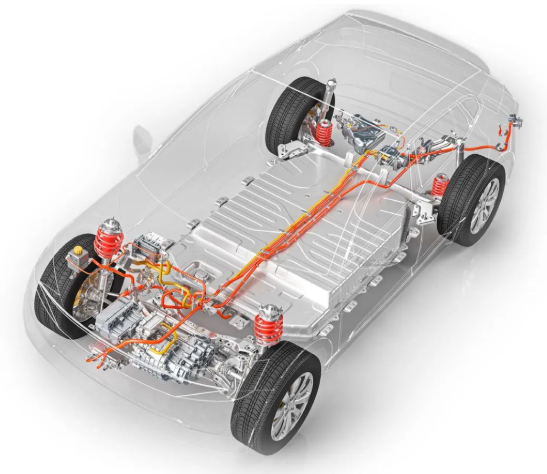
Our goal was to design a safe, reliable, and cost-optimized wiring harness system. This system had to meet stringent automotive industry standards. It also needed to adapt to the limited space in the engine compartment.
Step 2: Design Phase, Drawing the Blueprint
After the requirements were clear, we entered the design phase. This is the foundation of the entire project. Our technician first started work using specialized CAD software. They drew the two-dimensional schematic diagram of the wiring harness. This diagram defined the logical relationships of all electrical connections. It ensured the correct path for current and signals.
Next, the three-dimensional routing design was created. This process was crucial. We had to consider the actual routing of the wiring harness within the vehicle. We needed to avoid high-temperature areas, sharp edges, and moving parts. We worked closely with mechanical engineers. Together, we confirmed the position of each fixing point and branch. We selected appropriate clips, cable ties, and protective sleeves. These components protect the wiring harness from vibration, wear, and environmental damage.
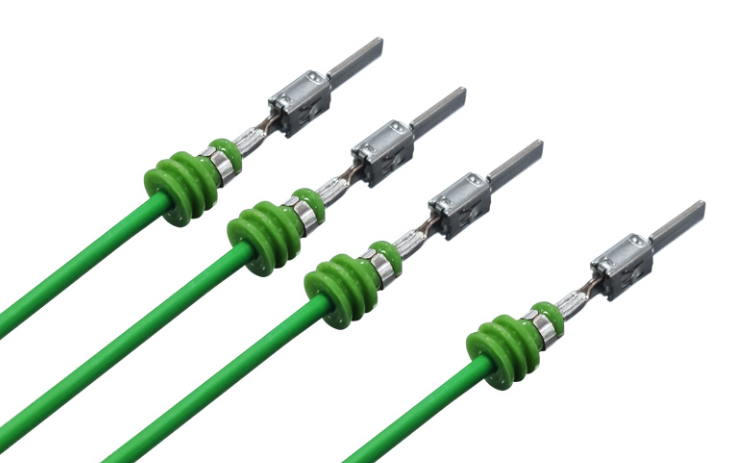
Simultaneously, we began component selection. We selected wires of different specifications for different functions. We determined the cross-sectional area of the wires based on the current. We chose various types of connectors. The connectors had to ensure good sealing and locking functions. We also specified protective materials like convoluted tubing and tape. All materials had to meet automotive-grade quality and durability requirements.
Step 3: Prototype Manufacturing, Verifying the Design
After the design drawings were completed, we entered the prototype manufacturing stage. This is a critical step to turn the virtual design into a physical object. We sent the design data to a professional prototype team. They manually made several complete wiring harness samples according to our drawings.
When I received the first prototype, I was very excited. However, the real challenge was just beginning. We took the prototypes to the laboratory and test vehicles. We conducted a series of strict tests. These tests included continuity tests. Continuity tests ensured there were no short circuits or open circuits. Tests also included insulation resistance tests. Insulation resistance tests checked the insulation performance of the wires.
We also conducted mechanical durability tests. We simulated vehicle vibration to check if the harness was securely fixed. We conducted environmental tests. Environmental tests involved placing the harness in high temperature, low temperature, and humid environments to verify its performance stability. The most important tests were bench simulations and real vehicle functional tests. We had to ensure all connected ECUs worked properly.
During testing, we indeed discovered some problems. For example, the length of one section of the harness was underestimated, causing it to be too tight during installation. Also, one connector model showed signs of loosening after repeated plugging and unplugging. We documented all issues in detail. Then, we went back to the design drawings to make revisions. We repeated this process three times. Finally, we obtained a fully qualified prototype.
Step 4: Small-Batch Trial Production, Refining the Process
Successful prototype verification did not mean mass production could start immediately. Next, we initiated the small-batch trial production phase. The goal of this stage was to verify the stability of the production line and processes.
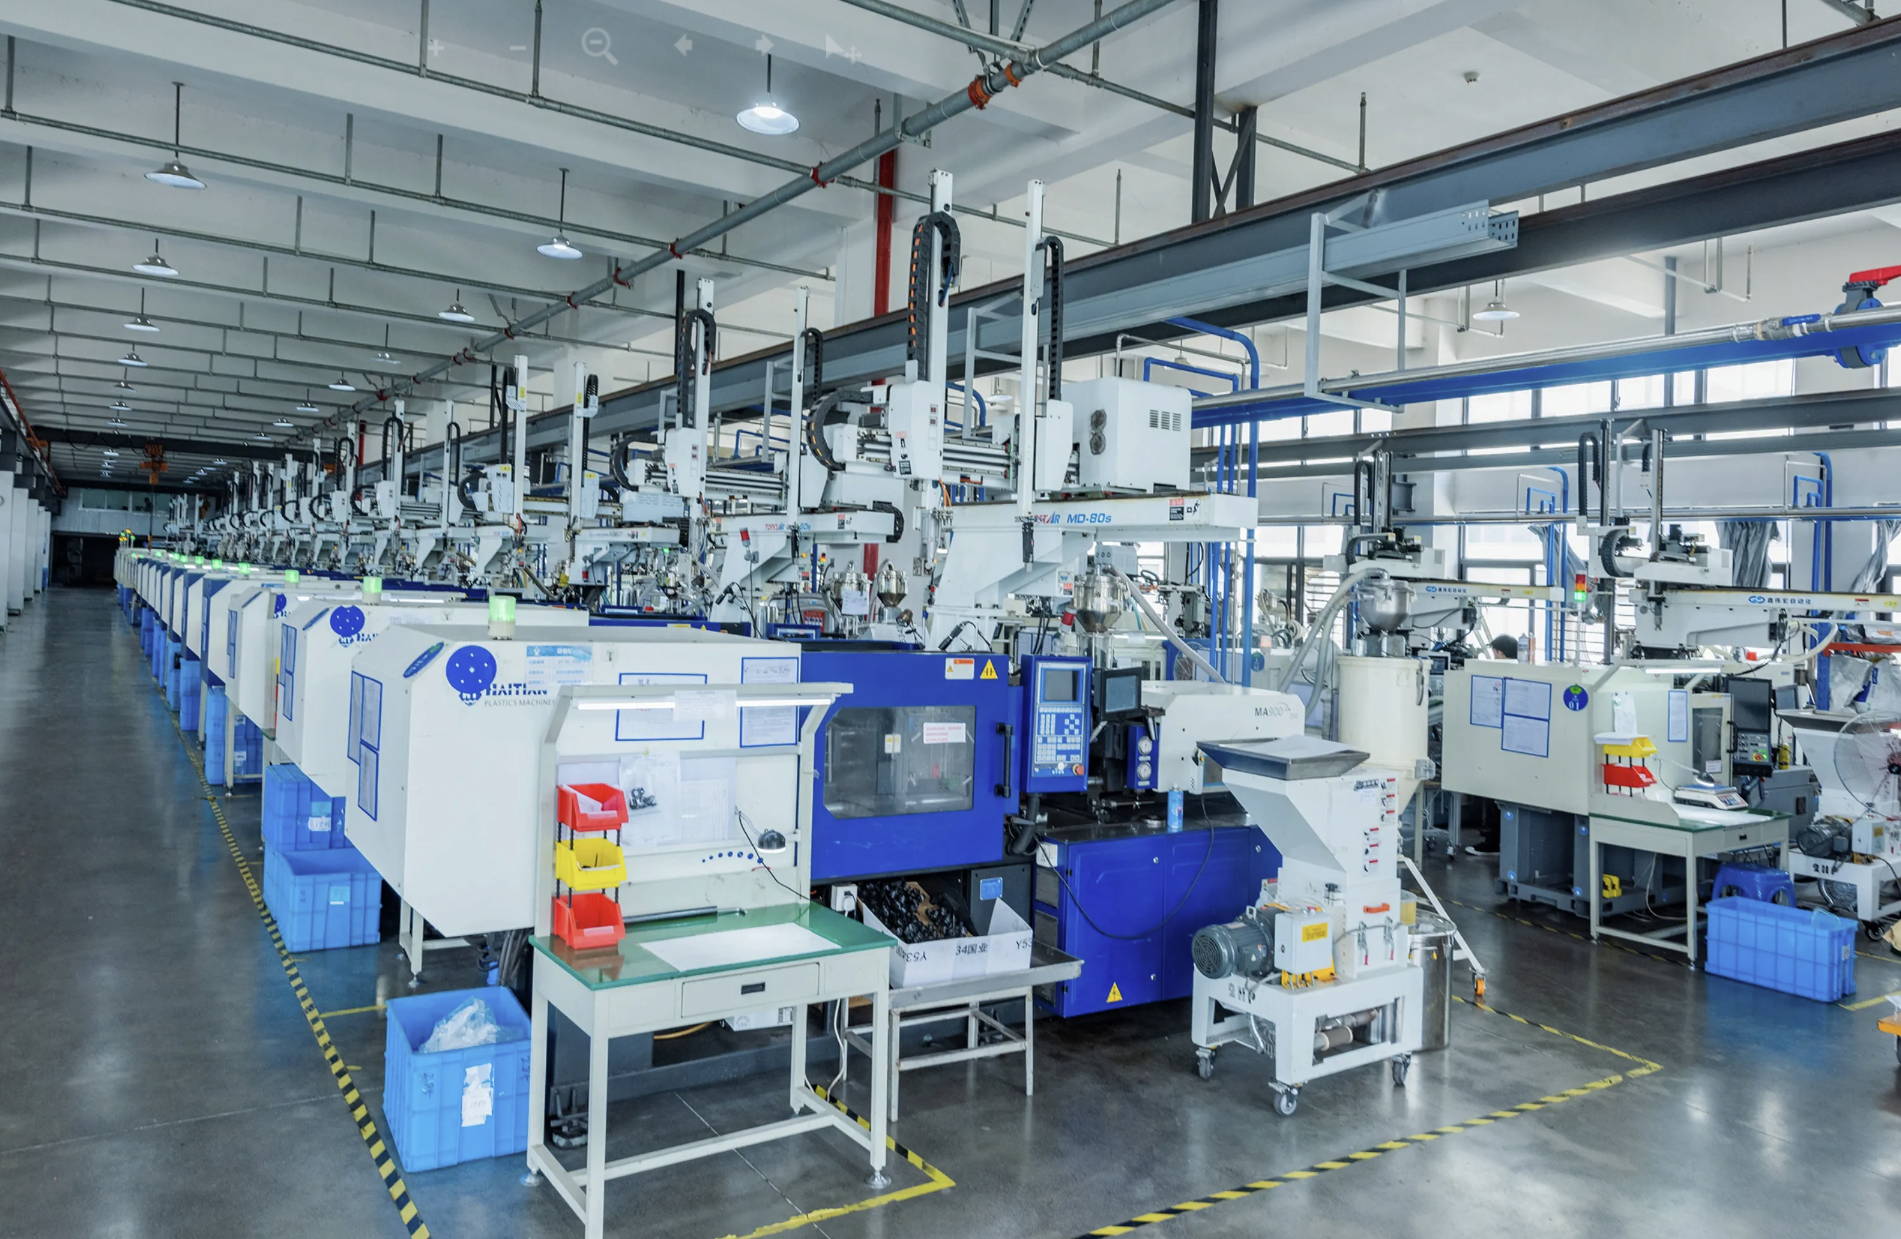
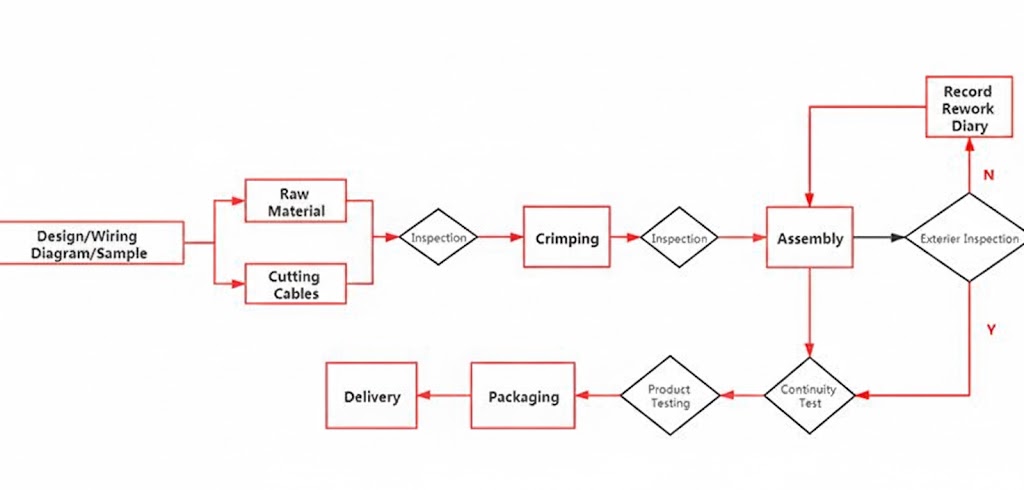
We worked with the selected factory engineers. Based on the final design data, we created the necessary equipment for production. I witnessed firsthand how the production line operated. Workers laid out the wiring harness on the assembly boards according to the drawings. They used automated equipment for operations requiring high precision, like wire stripping and terminal crimping.
We produced about 50 sets of wiring harnesses. These products were used for the client’s pre-production vehicles. These vehicles underwent longer road tests. At this stage, we focused no longer on design issues, but on production consistency. We checked every set of harnesses to ensure they were identical to the qualified prototype. We also optimized the work instructions to make the workers’ operations more standardized and efficient.
Step 5: Mass Production and Continuous Improvement
After passing the trial production phase, the project finally entered the final mass production stage. This was a milestone. But this did not mean my work was over.
Mass production took place on highly automated production lines. The production lines were equipped with advanced inspection systems. These systems could automatically identify defects like poor crimps or incorrect wiring. I still needed to visit the factory regularly. I conducted sampling inspections with the quality engineers. We ensured the quality of the shipped products was flawless.The automotive industry is constantly evolving. Even after mass production, we might receive engineering change requests from the client. For example, they might add a new feature. At this point, I needed to assess the impact of this change on the existing wiring harness design. If necessary, I initiated the design change process and simultaneously updated all documents and data on the production line. This is a process of continuous improvement and the pursuit of perfection.